
How to Overload a Back 4
Outletting against an organised press is difficult and often requires problem-solving as a unit to bypass the press. You can prepare for this by having a series of preplanned movements on which players can adapt and build upon. One of these movements that is commonly used is a back 4 overload. In this post we will go over the basics of overloading a back 4 before going into some further manipulations we can do. This article will specifically focus on how to overload either the Right or Left Half.
See end of post for an animated video
Basics of a Back 4 Overload

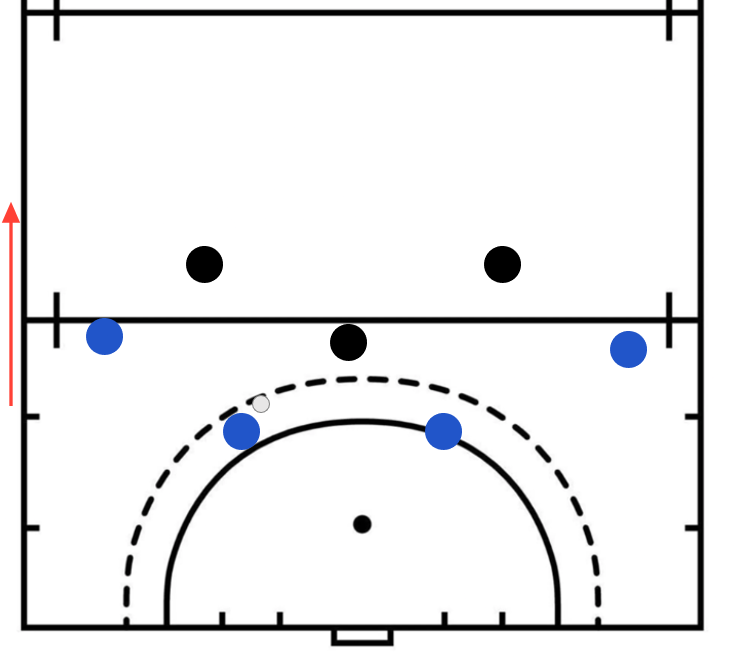
The above image shows what a standard set-up of a back 4 could look like from a 16. The key idea here is the dish-shaped backline of 4 players. Also, if you call the players by another name or have different terminology the concepts are still the same
Why do we need to Overload?
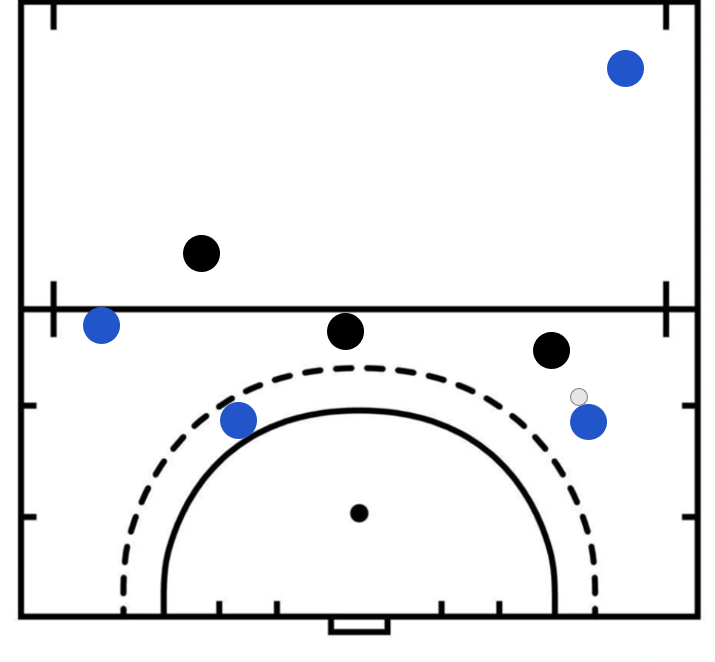
For further clarity, all the other players have been removed apart from the back 4. A standard front 3 press has been added in black.
If we were to outlet normally from this position with everyone staying exactly still we would end up with the ball at either the left half or the right half going 1v1 against the opposition black winger despite having a 4v3 numerical superiority.
So, how can we use our free player?
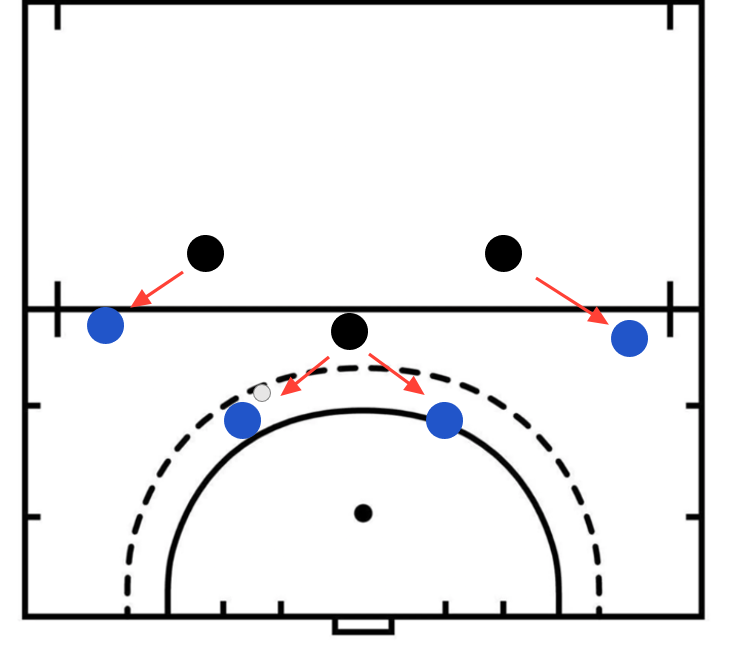
In the diagram above we can see that the black team's Centre Forward had 2 players and is managing them very well. Therefore, making our free player useless.
The Process
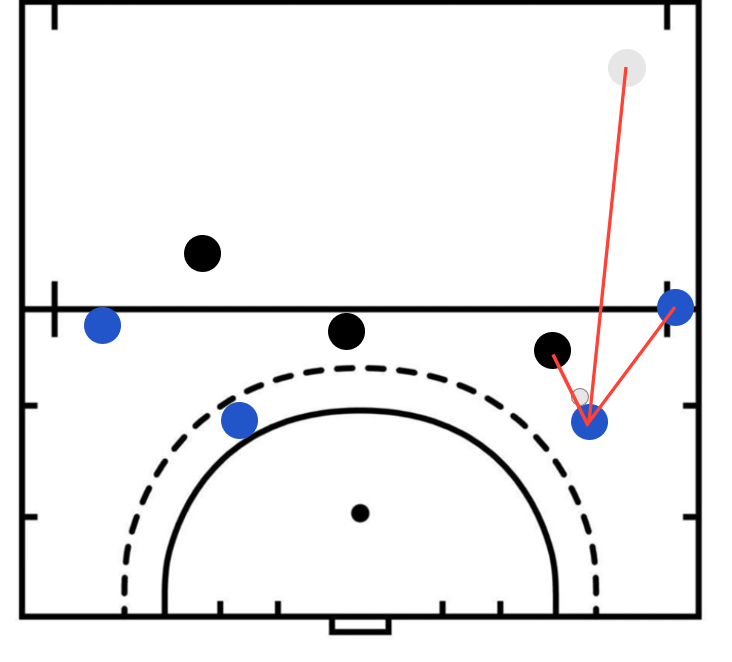
- The right Centre Back slides across the pitch stretching the area the opposition Centre Forward has to manage
- The Right Half pushes up the sideline beyond the opposition player
Or the left CB and LH if it is on the other side
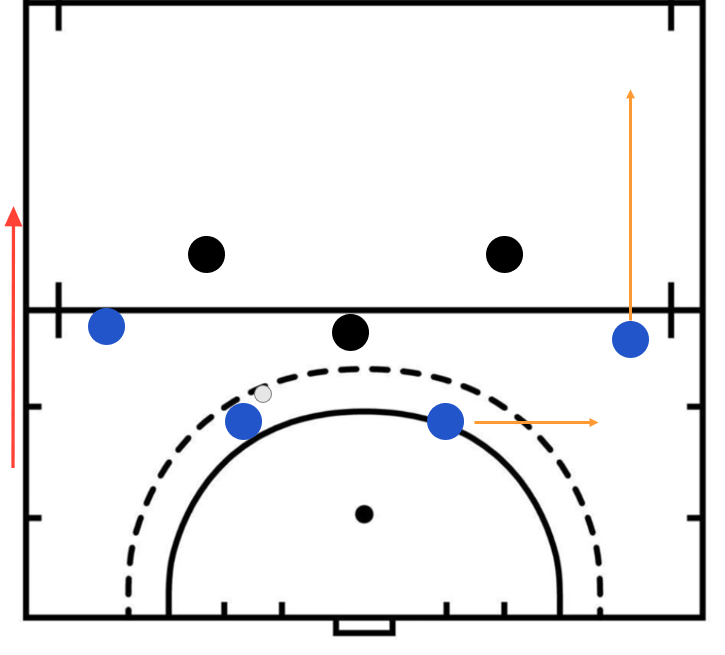
Here we see that we should be able to transition the ball easily around the press and find our free player with an easy 2v1 of the right Centre Back and the Right Half against the opposition's Left Wing.
What if?
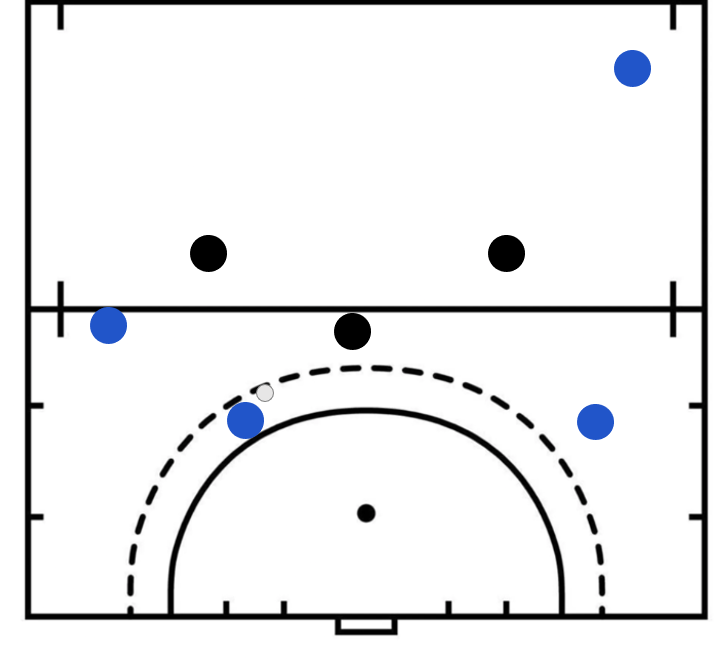
Realistically, the opposition will not just stand still the whole time and will likely move to adjust. Within this explanation, the most likely change is the Left Wing. They should either press up on the Right Centre Back or drop back and follow the Right Half up the sideline. Remember that almost limitless outcomes could happen, but some tend to occur more often depending on what level you play/coach at.
Scenario 1: Left Wing Steps up and presses the CB
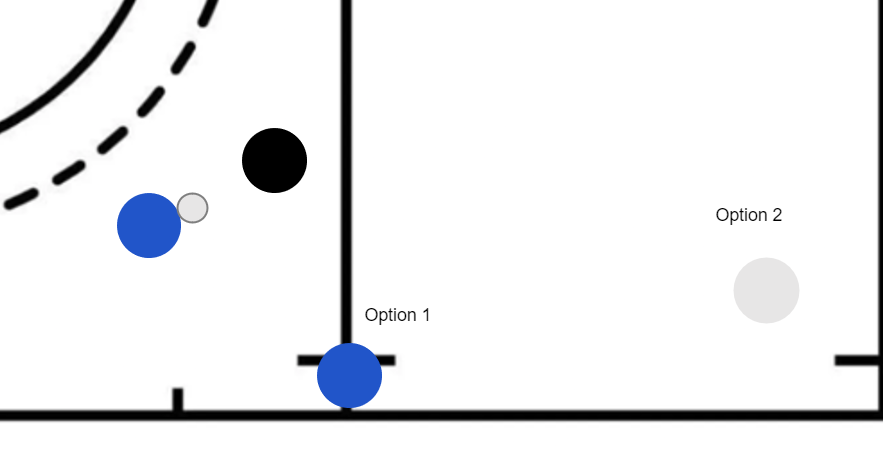
In this scenario, we have to get the ball to the free Right Half. However, currently, the pass is quite difficult to make as the black player could easily get a touch and disrupt the attack or even win the ball. Bypassing a 2v1 is all about angles and creating the easiest pass. To make the pass better and easier the Right Half must create a clear line between the CB and themselves. They can do this by coming as wide as possible and dropping deeper as shown in the image below. (Note image 2 is a zoomed-in and rotated view of the right side of the overload)
Angles
Consider choosing between making a pass to a player in option 2 or option 1. In both cases, the Right Half receives the ball in front of the defender and has a free run forward but option 1 is by far the easiest pass to make. Option 2 is a much more contested pass where the striker could easily intercept the pass or touch the ball over the sideline and disrupt the play. The fine art is the ability to go as far forward as possible to create as much space from the defender while keeping the pass open. In this example, the blue player in option 1 could easily go forward another 5 metres or even more and still keep the pass open.
Scenario 2: Left Wing follows the Right Half up the line
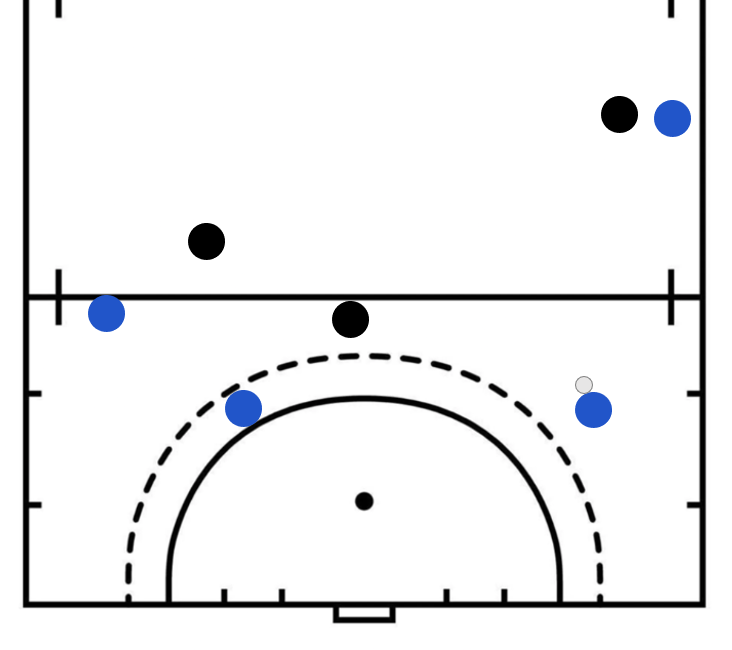
In this scenario, it makes no sense to pass the ball to the Right Wing straight away as we have lost our overload and it becomes a 1v1 again. This is the best possible outcome for the defensive team. As always we have a couple of basic options.
- Stand still and wait
- Pass the ball back to the other Centre Back
- Carry the ball forward into the space
In this case, the best option is to carry the ball forward. By carrying the ball forward we can hopefully get ahead of the other two strikers. Then we will get to a point where someone in the other team has to step up and confront. If the Right Half has been smart and targeted a player, then there should be an opportunity for a 2v1 or a momentary overload. For example, if the Right Half targets the opposition's Left Striker then they can create a 2v1 and progress the ball up the pitch. This is best illustrated in the video below.