
Half Court Press
Outlining the key points to performing a successful half-court press
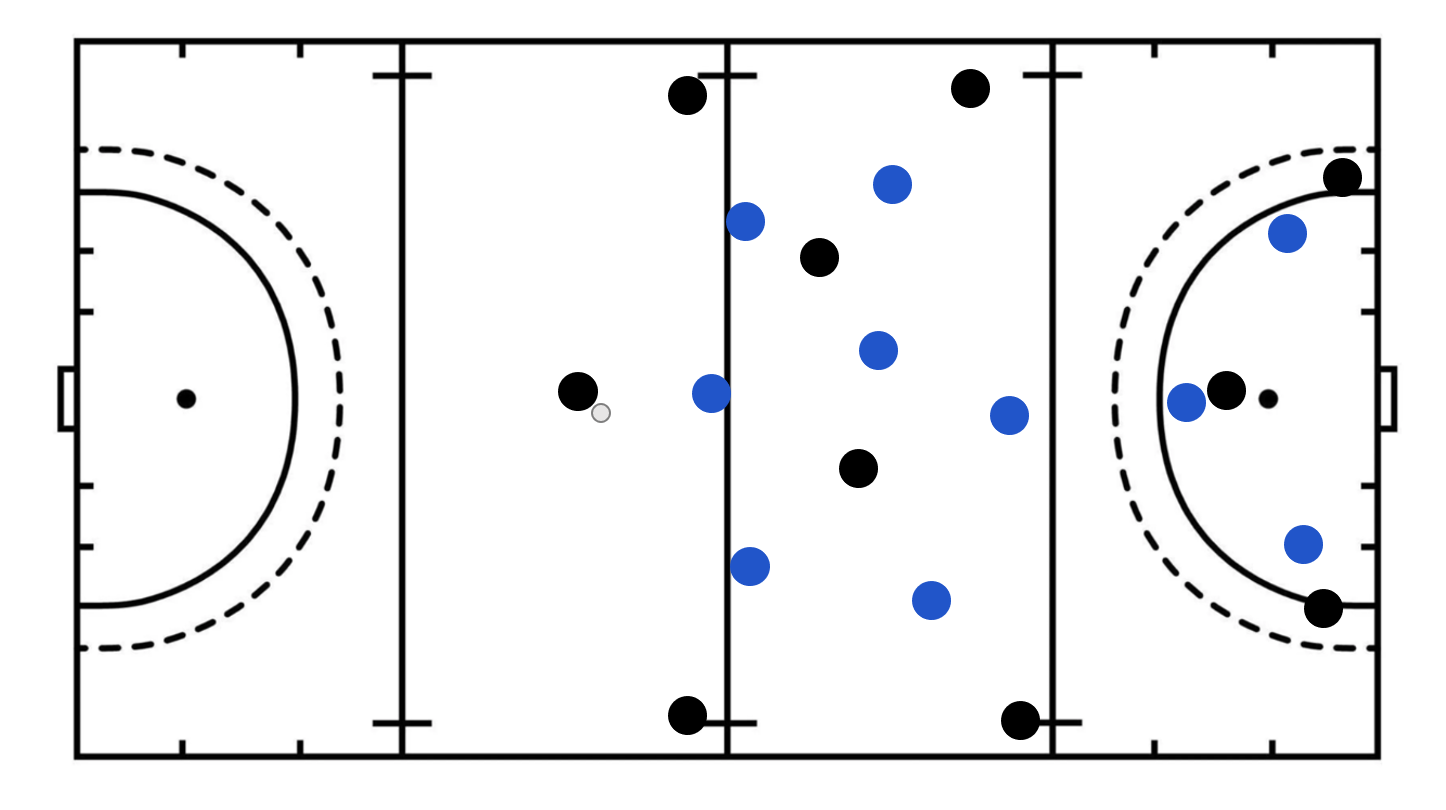
This post goes over the principles of a Half Court Press. As always, the pressing team is in blue and the outletting team is in Black. If you have any questions please post them in the comments.
Why Half Court Press?
- Reduces operating space for the opposition. Particularly useful if they are a very fast, aggressive team
- It allows for some rest on the field as the opposition can be allowed to move the ball around the back
- Opens the opposition up for counterattacks if they lose the ball
- It slows down the game
- Useful if you have been carded
Starting structure
Pressing
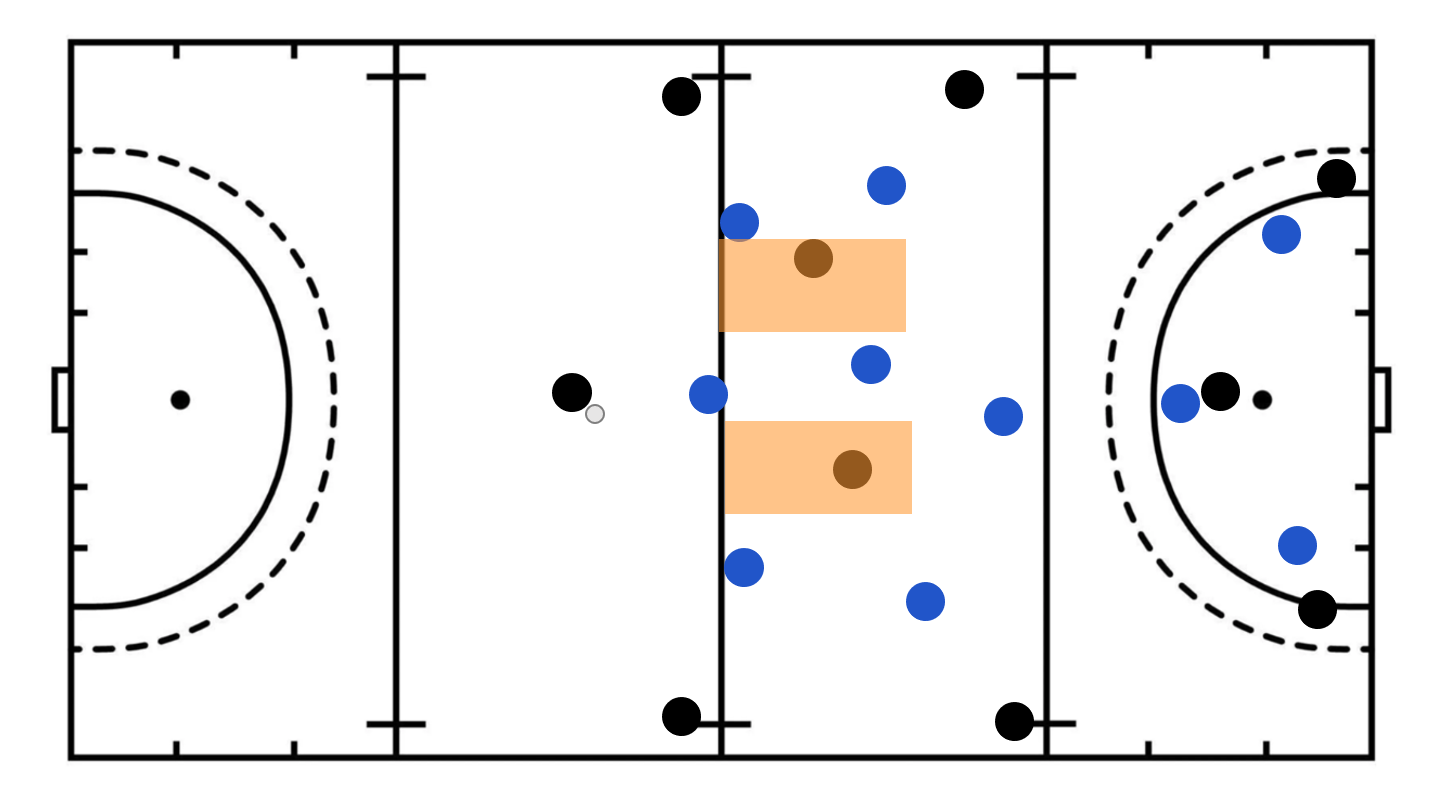
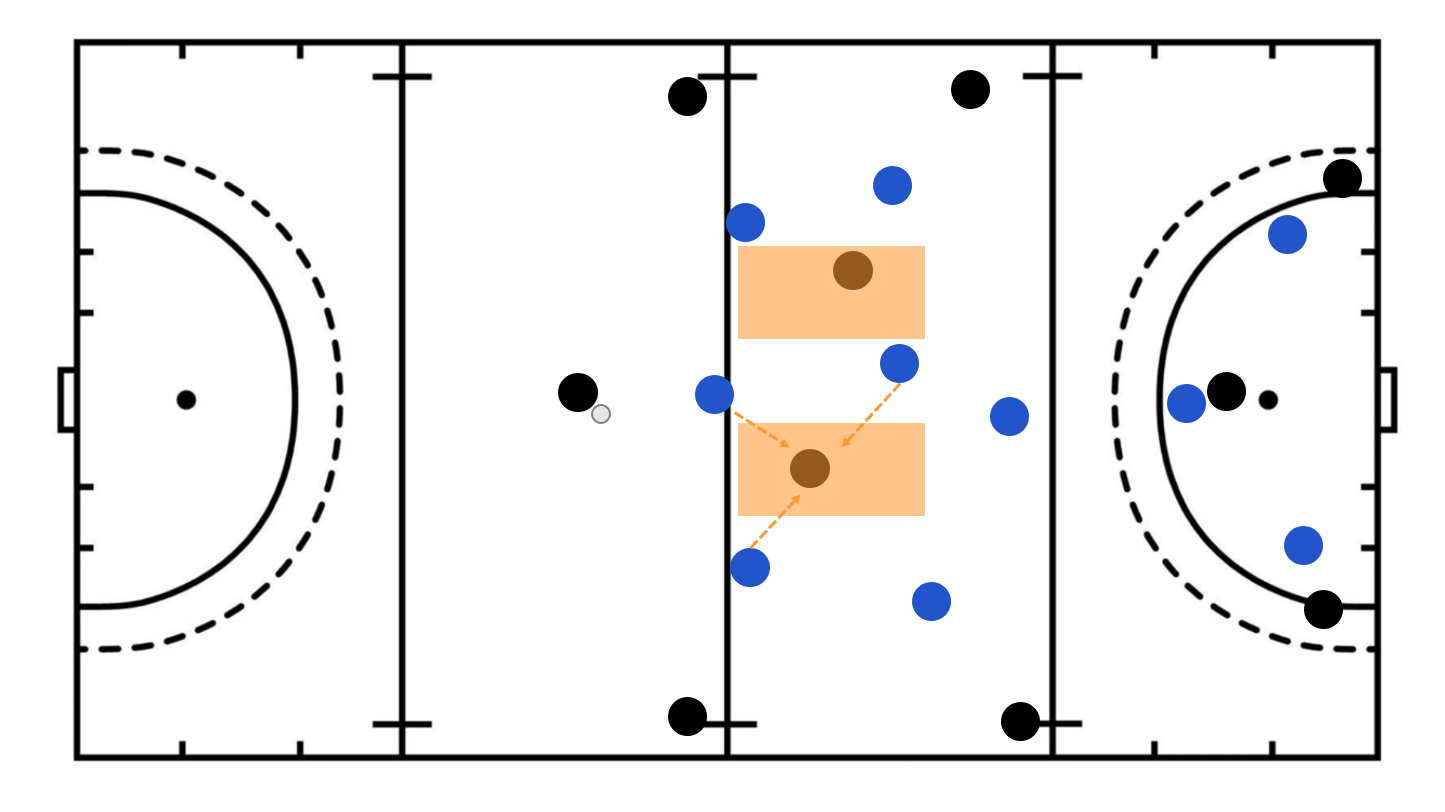
- The half court starting structure is pretty simple. It is a relatively zonal press with a general emphasis on pressing movements past the halfway line
- The orange rectangles highlight the ideal pressing location. A turnover in the middle presents a good opportunity to counterattack with almost even numbers. However, pressure is also applied when the Centre Back or the Right and Left Half starts moving forward. Additionally, if the opposing Attacking Midfielders manage to get the ball (Ideally, they would not).
- If the ball is transferred from the Centre Back to one of the halves the whole press simply slides to that side as pictured below
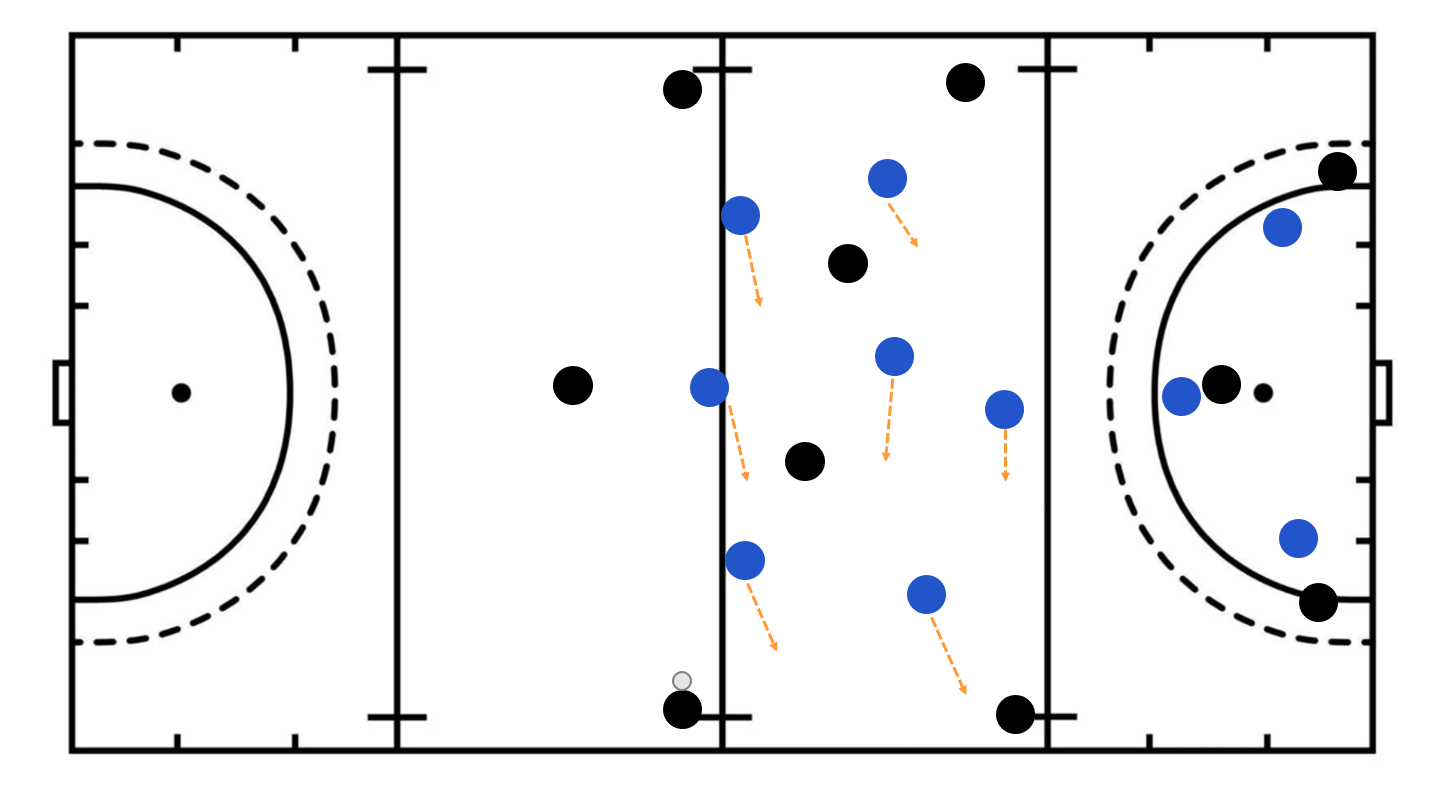
- Additionally, if a mistake is made, the team can press out and attack the Back 3. When this happens everyone else behind can either approach on the line or step up in front of their man.
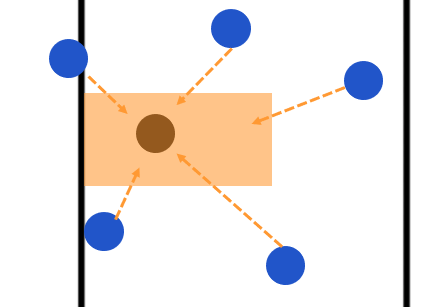
Pressing the Middle
As mentioned before, we want the ball to come into the orange pockets. Why? This is because we can 'pocket press' the opposition's Defensive Midfielders when they receive the ball. The first image on the left shows the numerical advantage we have when the opposition Midfielder receives the ball in the space. However, in order to prevent ourselves from becoming too exposed, usually the Centre Half, the Centre Foward and the Wing would press the Midfielder. However, the Freeman and the Attacking Midfielder may need to step in if required. The only thing they need to be aware of is that when the Freeman commits we are exposed if they manage to transfer the ball out and around. Also, when the Attacking Midfielder commits they provide the option for the opposition Defensive Midfielder to Outlet. So, if they do commit, they need to commit on the line between the two players and get there fast enough to keep the opposing player's head down. Another note with our Attacking Midfielders is that they constantly have to be aware of the aerial threat to their opposing Attacking Midfielders as this could easily develop into a dangerous situation.
Why can it Fail?
- As mentioned previously, the aerial threat to the Attacking Midfielders can easily undo the press
- If the opposing team's Defensive Midfielders have enough time to get their head up within the press
- It becomes more difficult if one of the Front Three gets eliminated easily
- If the Front Three sag, The defensive can slowly creep up the pitch. Also, the structure of the press can become compromised. It is important that the Front Three creep themselves. Maintaining that presence on the Back 3 and looking to pounce upon a poor pass.